 Save
Save My daughter's eyes lit up the moment she spotted these little dirt cups on a Pinterest board, and suddenly Easter prep became less about traditional ham dinners and more about creating edible tiny gardens. What started as me trying to keep her entertained in the kitchen turned into the most requested dessert at our family gathering—turns out there's something irresistible about giving kids permission to eat "dirt" straight from a cup. The beauty of this recipe is that it requires zero baking skills, zero oven time, and somehow still feels like you've created something magical. I've made these so many times now that my hands could probably do it blindfolded, but watching new people discover them never gets old.
I'll never forget the Easter when my nephew refused to eat anything else at the table except these cups, and his mom kept whispering apologies to me like I'd somehow created the world's most addictive dessert. The funniest part was watching the adults sneak extra cups when they thought no one was looking—turns out "kid desserts" are just as appealing to people who appreciate good chocolate and nostalgia.
Ingredients
- Cold whole milk: Use it straight from the fridge because the pudding needs that chill to set properly, and warm milk means a runnier texture that won't hold its shape in the layers.
- Instant chocolate pudding mix: The 3.9 oz packets are the standard size, and honestly, they're engineered perfectly for this—no need to get fancy with homemade pudding unless you really want to.
- Chocolate sandwich cookies: Oreos are the obvious choice, but store brands work just as well and sometimes even taste better when they're slightly softer for crushing.
- Whipped topping: Cool Whip from the freezer section is convenient, though freshly whipped cream tastes richer and feels a bit more special if you have time.
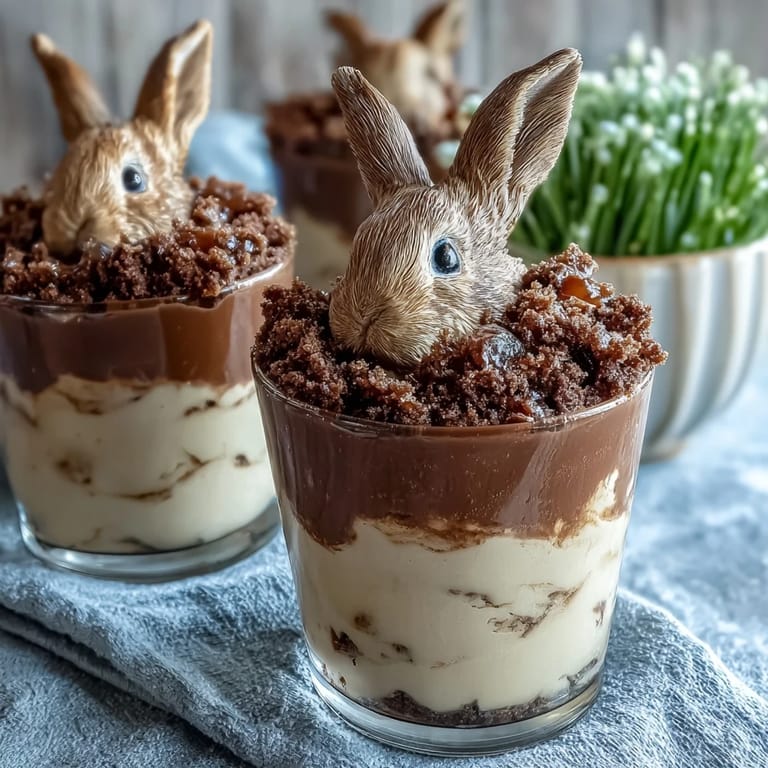
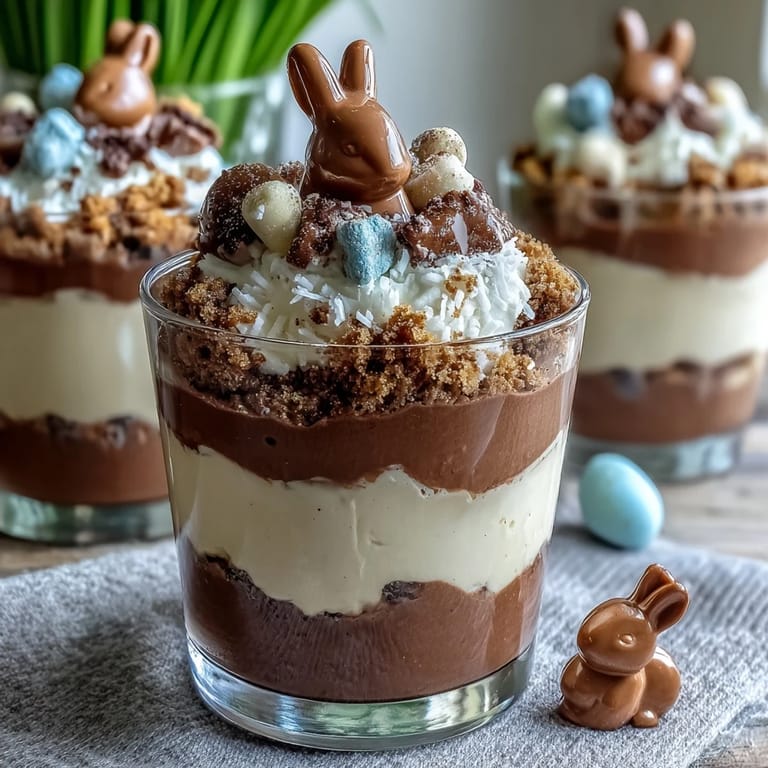
- Marshmallow bunny Peeps: These are the star of the show—they stay surprisingly firm inside the cold pudding and kids love the pastel colors.
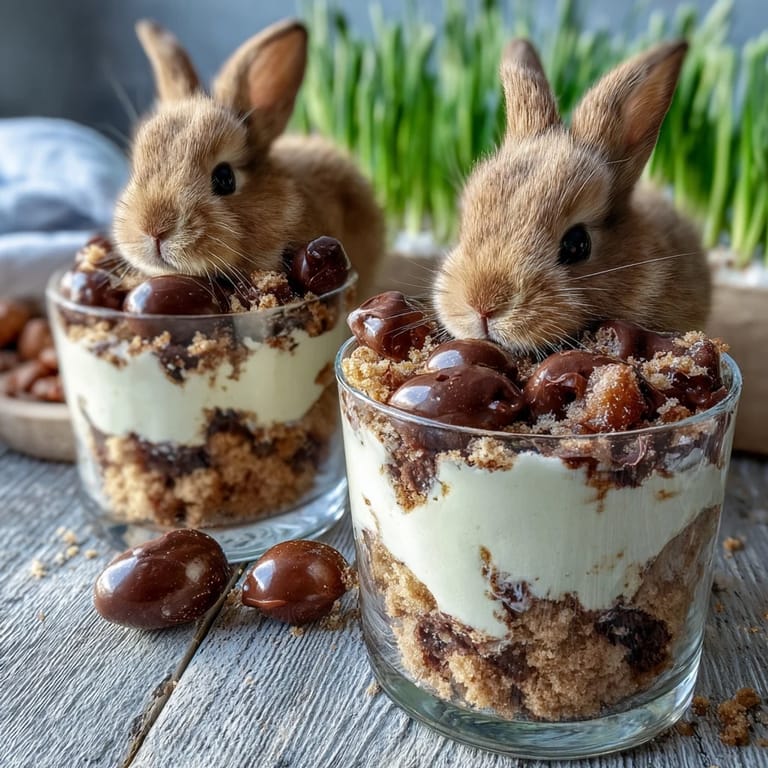
- Candy-coated chocolate eggs: Mini eggs add that final Easter touch and provide little bursts of chocolate flavor with each spoonful.
- Green-tinted shredded coconut: This is the optional "grass" that makes the whole thing look like a garden, and it adds a tropical whisper of flavor.
Tired of Takeout? 🥡
Get 10 meals you can make faster than delivery arrives. Seriously.
One email. No spam. Unsubscribe anytime.
Instructions
- Make the chocolate pudding foundation:
- Whisk the cold milk and pudding mix together for exactly 2 minutes—you'll feel it thicken under your whisk like magic, and then let it sit for 5 more minutes so it gets to the perfect spoonable consistency. Don't skip this resting time or you'll end up with pudding that's still too thin to layer properly.
- Crush the cookie dirt:
- Pop those cookies into a zip-top bag and go at them with a rolling pin—some people use a meat mallet, but I find the rolling pin gives you better control and way more therapeutic stress relief. You want mostly fine crumbs with just a few chunkier pieces for texture.
- Layer the pudding:
- Spoon about 1/4 cup of pudding into each clear cup, going straight to the bottom so you can see those beautiful layers later. This is the foundation, so don't be shy with it.
- Add the creamy cloud:
- Top each pudding layer with a heaping tablespoon of whipped topping, smoothing it out gently like you're frosting a tiny cake. This layer keeps the cookies from getting soggy and adds that cloud-like texture kids love.
- Create the dirt layer:
- Sprinkle 2 to 3 tablespoons of crushed cookies over the whipped topping in each cup, and here's where it gets fun—this is where the illusion of "dirt" really comes together. The darker cookies against the white cream make it look genuinely like you've potted a dessert garden.
- Plant your bunny:
- Gently press a marshmallow bunny Peep into each cup so it stands upright in the cookie dirt like it's actually burrowed there. If your Peep is sinking, pack the cookies down a bit more to give it a solid foundation.
- Final decorations and serving:
- Scatter the mini candy eggs around each bunny and add a light dusting of green-tinted coconut to look like grass sprouting from the dirt. Serve immediately while everything is cold and fresh, or refrigerate until you're ready—these actually stay good for a few hours.
 Save
Save There was this one Easter when my friend's four-year-old presented her dirt cup to me like she'd personally engineered the most sophisticated dessert known to humanity, and that's when I realized these aren't just treats—they're tiny edible art projects that somehow taste incredible.
Customizing Your Dirt Cups
The beauty of this recipe is how flexible it actually is once you understand the basic layering principle. I've made these with crushed vanilla wafers instead of chocolate cookies, and they were equally delicious in a lighter, more subtle way. Some friends have added a small scoop of chocolate ice cream as an extra layer, which turns them into a semi-frozen situation that's amazing on hot days. You could even drizzle a tiny bit of chocolate syrup between layers if you're feeling ambitious—it doesn't change the assembly time but definitely ups the decadence factor.
Making These Nut-Free and Allergy-Conscious
I always check the labels on everything because people's allergies are serious business, and I've learned that "made in a facility" matters just as much as the actual ingredient list. Certified nut-free cookies are easier to find than you'd think, and most major brands now clearly label whether their products are processed in nut-free environments. The candy eggs and Peeps usually don't have nut warnings, but double-checking takes 30 seconds and prevents any Easter surprises nobody wants.
Make-Ahead Wisdom and Storage
These cups hold up beautifully in the fridge for several hours, which means you can actually make them in the morning for an afternoon party without any last-minute panic. The pudding stays creamy, the whipped topping keeps its texture, and the cookies only gradually absorb moisture—so even a few hours later they're still satisfying. I learned this the hard way when I thought they'd go bad in just an hour, but honestly, I've eaten leftovers the next day and they were still good.
- Don't assemble these more than 6 hours ahead or the cookie layer starts turning into actual mud instead of maintaining that delightful crunch.
- Keep them covered lightly with plastic wrap in the fridge so they don't pick up any weird flavors from leftover ham or other Easter dinner stuff.
- Bring them to room temperature for just 5 minutes before eating if you want that chocolate pudding to taste extra rich and smooth.
 Save
Save These little dirt cups have become my go-to Easter move because they deliver pure joy in a fraction of the time most desserts require. There's something special about watching people's faces when they realize what they're eating, and honestly, that moment is worth every bit of the preparation.
Recipe FAQ
- → Can I make this dessert ahead of time?
Yes, you can refrigerate the assembled cups for a few hours before serving to let the layers set and meld flavors together.
- → Are there suitable alternatives for whipped topping?
Freshly whipped cream or coconut whipped cream works well and can add a natural texture to the layers.
- → How do I crush the cookies without a food processor?
Place cookies in a zip-top bag and use a rolling pin to crush them into fine crumbs evenly.
- → What decorations can replace marshmallow bunnies?
Try small chocolate bunnies, Easter-themed candies, or gummy worms for similar festive touches.
- → Is this dessert suitable for vegetarians?
Yes, it contains no meat and can be made vegetarian-friendly by checking ingredient labels for gelatin or animal-derived additives.
- → Can the cookie layer be made gluten-free?
Using gluten-free sandwich cookies will ensure suitability for gluten-sensitive diets while maintaining the crunchy texture.