 Save
Save My first pierogi came from my neighbor's kitchen on a snowy January evening, the kind of night where the whole street smelled like butter and boiling water. She'd invited me over almost as an afterthought, and I watched her hands move through the dough with such ease that I thought it was impossible until she handed me a circle and said, "Now you." That single pierogi, golden and split at the seams with caramelized onions spilling out, changed how I thought about simple food. Twenty years later, I still chase that exact texture and flavor.
I made these for my partner's coworkers during a potluck, nervous the whole way there that they'd be too simple, too ethnic, too foreign for a suburban crowd. Instead, someone asked for the recipe before finishing their plate, and another person ate five in a row without pausing. That moment of watching something from my neighbor's kitchen become loved in a room full of strangers felt like passing something forward.
Ingredients
- All-purpose flour: The foundation needs to be soft and slightly elastic; don't skip the rest time or your dough will tear when you try to seal the edges.
- Egg and sour cream: These are what make the dough tender rather than tough, and they're non-negotiable if you want that delicate texture.
- Lukewarm water: Too hot and you'll cook the egg; too cold and the dough fights you the entire way.
- Russet potatoes: Starchy varieties break down into a creamy filling without staying grainy or watery.
- Farmers cheese or drained ricotta: The richness here is what transforms plain mashed potatoes into something craveable.
- Sharp cheddar: Don't use mild; you need enough flavor to taste it in every bite.
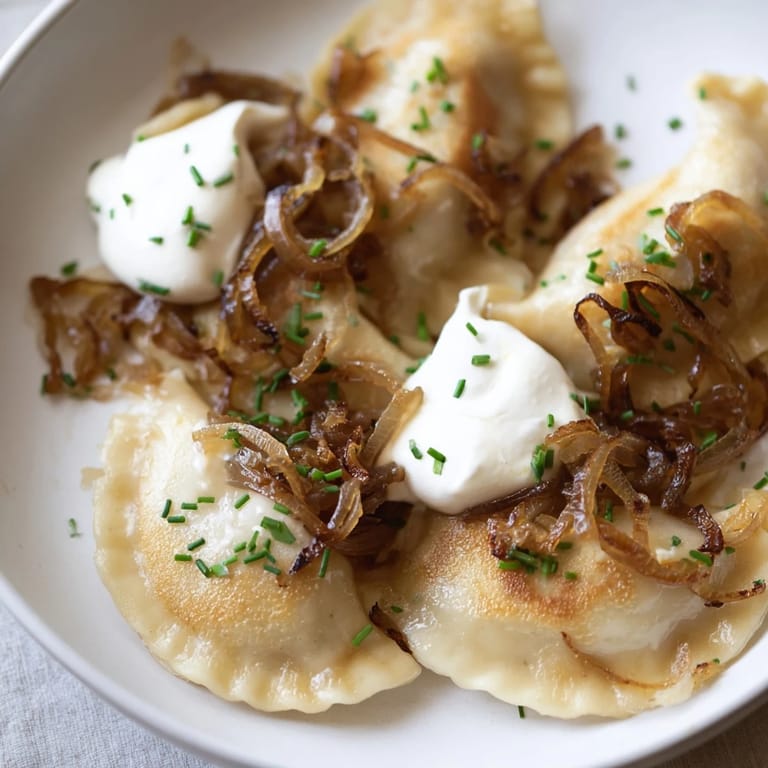
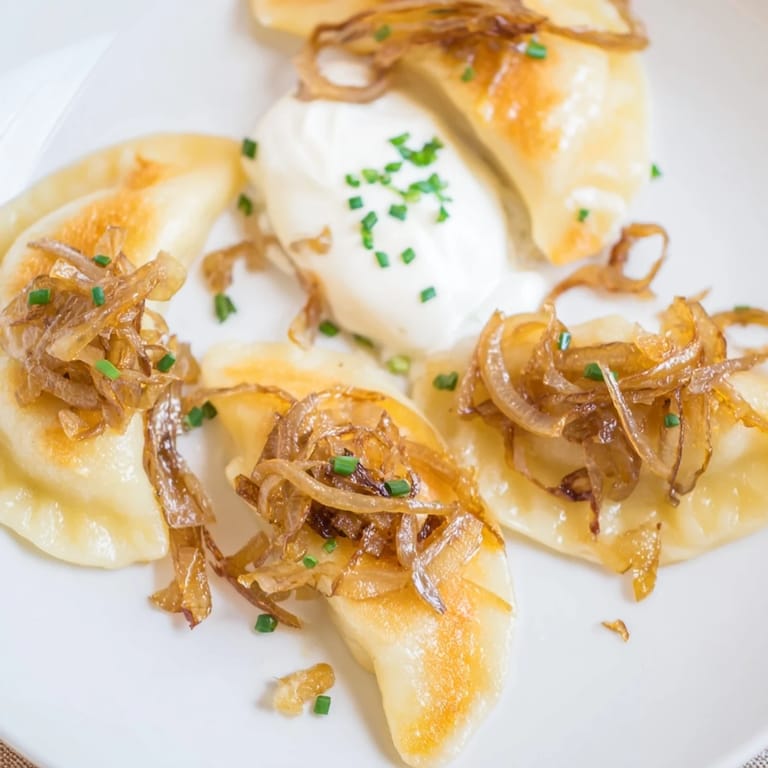
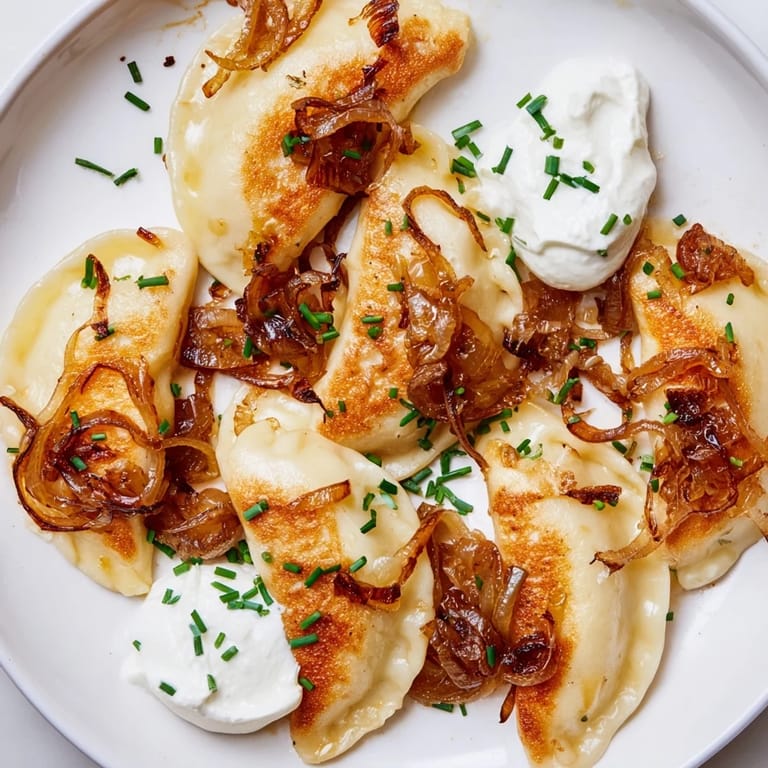
- Onions for serving: Low and slow caramelization is the entire point; rushing this step is the only real mistake you can make.
Tired of Takeout? 🥡
Get 10 meals you can make faster than delivery arrives. Seriously.
One email. No spam. Unsubscribe anytime.
Instructions
- Mix and knead the dough:
- Combine your flour and salt in a wide bowl, then create a small well in the center like you're building a flour dam. Add your egg, melted butter, sour cream, and water all at once, then use your fingers to gradually pull the flour into the wet ingredients until it comes together. Once it's rough, move to a clean counter and knead for 5 to 7 minutes, adding just a pinch of flour if it's sticking, until the dough feels smooth and slightly bouncy under your hands.
- Rest the dough:
- Cover it with a damp kitchen towel and let it sit for 30 minutes at room temperature. This sounds like a small step, but it's when the gluten relaxes and the dough becomes forgiving enough to roll thin without tearing.
- Cook and season the filling:
- Boil your cubed potatoes in generously salted water until they're completely soft, about 15 to 18 minutes, then drain them well in a colander and mash until smooth. In a separate skillet, melt butter over medium heat and cook your finely chopped onion until it's golden and sweet, about 5 minutes, then fold this into the potatoes along with both cheeses and season generously with salt and pepper. Taste it and adjust before letting it cool completely; cold filling is much easier to work with.
- Roll and shape the pierogi:
- Flour your work surface generously and roll the dough to about ⅛ inch thick, which sounds thin but is right when you can just barely see your hands through it. Cut circles with a 3-inch cutter, add a heaping teaspoon of filling to each, then fold in half and pinch the edges so hard you think you're sealing them forever, then pinch a little harder. Stack them under a towel so they don't dry out.
- Boil gently:
- Bring a large pot of salted water to a gentle boil and cook your pierogi in batches so they have room to move around. They're done when they float to the surface plus about 1 to 2 minutes more, at which point they'll be pillowy and perfect.
- Caramelize the onions:
- This is where patience pays off. Melt your butter in a wide skillet over medium-low heat, add your thinly sliced onions, and stir them every few minutes as they soften and gradually turn from golden to deep amber, a process that takes 20 to 25 minutes and fills your kitchen with a smell you'll remember.
- Pan-fry until golden:
- In the same skillet, add your boiled pierogi in batches and fry on both sides until they develop a crisp, golden-brown crust, about 2 to 3 minutes per side. Don't overcrowd the pan or they'll steam instead of fry.
 Save
Save My neighbor passed away five years ago, and I haven't made pierogi the same way since. Now when I make them, I use her exact method, and my hands move the way hers did, and for a moment while I'm folding the dough, I feel like she's right there in the kitchen with me, watching to make sure I'm doing it right.
Make-Ahead and Freezing
The best part about pierogi is that you can make them days before you need them. Arrange your uncooked pierogi on a baking sheet, freeze them solid, then transfer them to a freezer bag where they'll keep for up to 2 months, and you can cook them directly from frozen without thawing. This means you can have homemade pierogi ready in about 20 minutes any night of the week, which is honestly when these dumplings became a regular part of my rotation instead of a special occasion dish.
Cheese and Filling Swaps
If you can't find farmers cheese, well-drained cottage cheese works just as well and might even be easier to find. Some people use a mix of sharp cheddar and gruyere, which adds a nuttiness that's remarkable. The filling should always feel rich and smooth, so taste as you go and don't be shy about adding more cheese if the potatoes seem flat.
Serving and Pairing Ideas
Pierogi want sour cream, always, and caramelized onions, always, but they also welcome a little chopped parsley or chives for brightness. Some people serve them alongside a simple green salad, and some people just keep adding more pierogi to their plate until they realize they've eaten eight and feel gloriously full.
- A crisp Polish lager or dry white wine is the only drink that feels right alongside these.
- Leftover pierogi reheat beautifully in a skillet with a little butter, which means breakfast is also an option.
- These freeze beautifully, so make a huge batch and give some to a friend who looks like they need comfort food.
 Save
Save These dumplings have survived through generations and continents because they're simple enough for anyone to make and generous enough to feel like someone loves you. Make them once and you'll understand why.
Recipe FAQ
- → What type of cheese works best for the filling?
Farmers cheese combined with sharp cheddar gives a creamy texture and balanced flavor, but well-drained ricotta or cottage cheese are suitable alternatives.
- → How do I achieve a perfect dough consistency?
Mixing flour, egg, sour cream, melted butter, and lukewarm water produces a smooth, elastic dough when kneaded for 5–7 minutes and rested for at least 30 minutes.
- → What is the ideal method to cook the dumplings?
Boil the dumplings in salted water until they float, then pan-fry them in butter until golden and crisp on both sides for added texture.
- → How are the onions prepared to accompany the dumplings?
Onions are sliced thin, then slowly caramelized in butter over medium-low heat until deeply golden and sweet, enhancing the savory flavors.
- → Can these dumplings be frozen before cooking?
Yes, uncooked dumplings can be frozen on a tray, then transferred to bags and stored for up to 2 months without loss of quality.