 Save
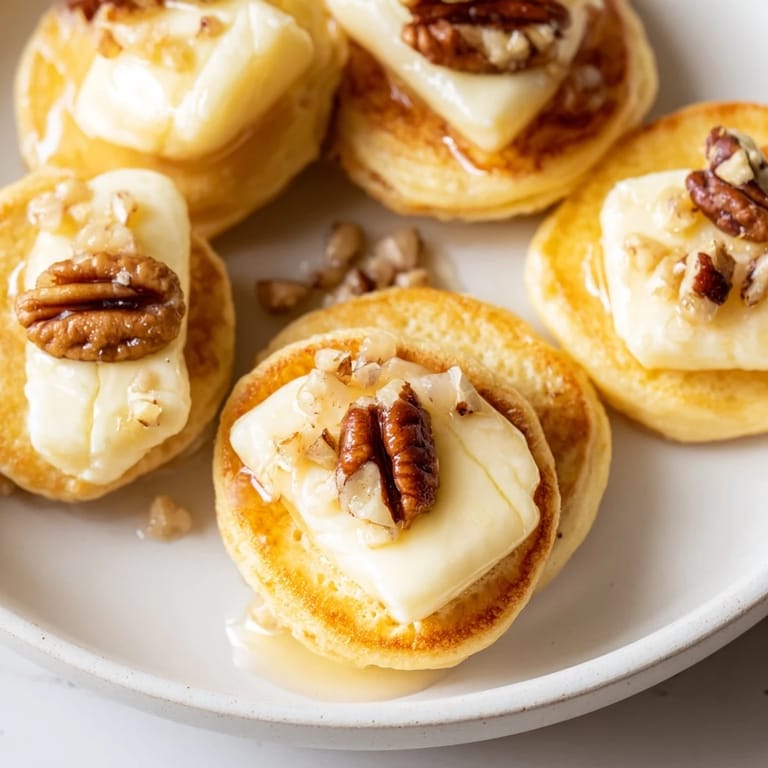
Save My friend Sarah brought these to a dinner party last spring, and I watched people's faces light up the moment they bit into one—that surprised silence when sweetness meets the creamy, earthy warmth of melted brie. She'd spent only twenty minutes in the kitchen, but somehow made it feel effortless. I asked for the recipe that night, and now I understand why she kept it close: they're deceptively simple, yet they taste like you've spent hours being clever.
I made a double batch for my daughter's first day of school open house, thinking I'd have extras to freeze. I didn't—parents came back for thirds, and I stood there watching the platter empty while my daughter beamed like I'd invented the wheel. That's when I realized these aren't just appetizers; they're conversation starters that happen to be made of pancake batter and brie.
Ingredients
- All-purpose flour (1 1/2 cups): This is your structure; it keeps the bites tender and fluffy instead of dense. Don't sift unless you love extra work—whisking it into the dry ingredients does the job.
- Granulated sugar (2 tbsp): Just enough to hint at sweetness without making these taste like dessert; it also helps the tops brown beautifully.
- Baking powder and baking soda (1 1/2 tsp and 1/2 tsp): This duo is what makes them fluffy, so don't skip either one or you'll end up with hockey pucks.
- Salt (1/4 tsp): A tiny pinch that makes the brie flavor pop instead of fade.
- Whole milk (1 cup): Use whole milk, not low-fat; it creates richness that pairs perfectly with the cheese.
- Large eggs (2): They bind everything and add moisture that keeps the bites from drying out during baking.
- Unsalted butter, melted (4 tbsp): Melt it and let it cool slightly before mixing so it doesn't cook the eggs; this creates tender crumbs.
- Vanilla extract (1 tsp): A whisper of vanilla adds complexity without being obvious.
- Brie cheese (8 oz, cubed): Cut your cubes to about 2 cm—any larger and they won't cook through; any smaller and you lose that creamy center that makes these special.
- Unsalted butter for greasing (2 tbsp melted): This prevents sticking and adds a subtle buttery edge to the edges.
- Honey or maple syrup (optional, 2 tbsp): Drizzle these on warm bites just before serving; the warmth softens the brie underneath into something almost luxurious.
- Toasted pecans or walnuts (1/4 cup chopped, optional): Toast them yourself if you have time—the smell alone is worth it, and they add a gentle crunch against the creamy center.
Tired of Takeout? 🥡
Get 10 meals you can make faster than delivery arrives. Seriously.
One email. No spam. Unsubscribe anytime.
Instructions
- Heat your oven and prepare the tin:
- Preheat to 375°F while you get a mini muffin tin and brush each cup generously with melted butter—take a moment here, because skipping this step means you'll be fishing bites out of the tin like you're mining for treasure.
- Combine your dry ingredients:
- Whisk flour, sugar, baking powder, baking soda, and salt in a large bowl. This takes about thirty seconds and ensures the leavening is distributed evenly.
- Mix the wet ingredients in a separate bowl:
- Whisk together milk, eggs, melted butter, and vanilla until combined. You'll hear a slight change in sound when the eggs are fully incorporated.
- Fold wet into dry gently:
- Pour the wet mixture into the dry ingredients and stir just until you don't see streaks of flour anymore—overmixing develops gluten and makes them tough instead of tender. A few lumps are your friends here.
- Fill the muffin cups:
- Spoon about a tablespoon of batter into each greased cup, filling them about halfway. This is where precision matters slightly, but don't stress if some cups have a bit more than others.
- Add the brie and cover:
- Place one brie cube in the center of each cup, then top with another spoonful of batter until the cheese is fully covered. You want them nestled in the middle, not pressed against the bottom or the edges.
- Bake until golden:
- Slide the tin into the oven for 15–18 minutes until the tops are golden brown and a toothpick inserted next to (not through) the cheese comes out clean. The exact time depends on your oven, so check at 15 minutes the first time.
- Cool and release:
- Let them rest in the pan for 5 minutes—this sets them enough to handle without falling apart. Run a small knife around the edges of each bite, then pop them out gently.
- Finish and serve:
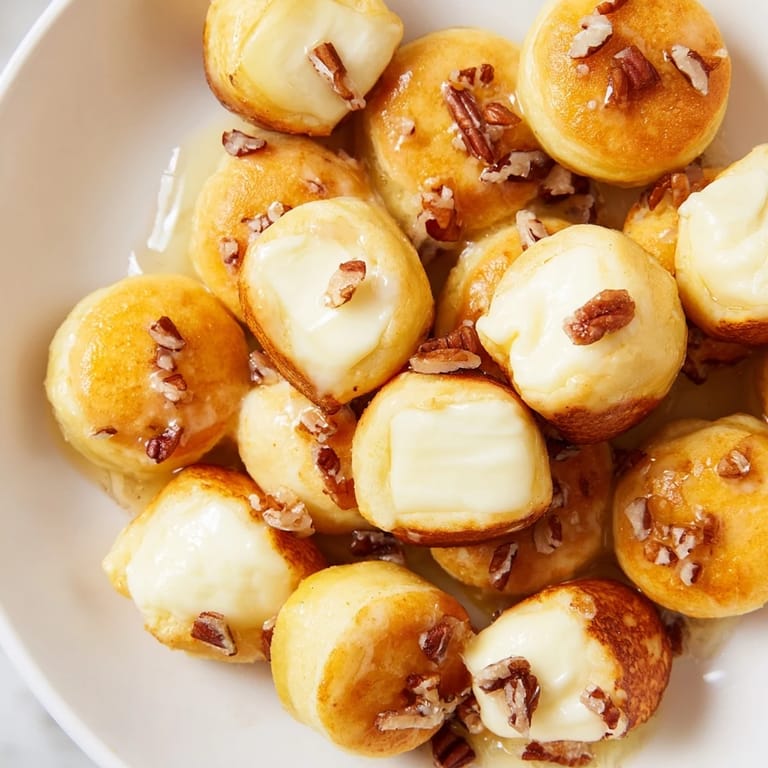
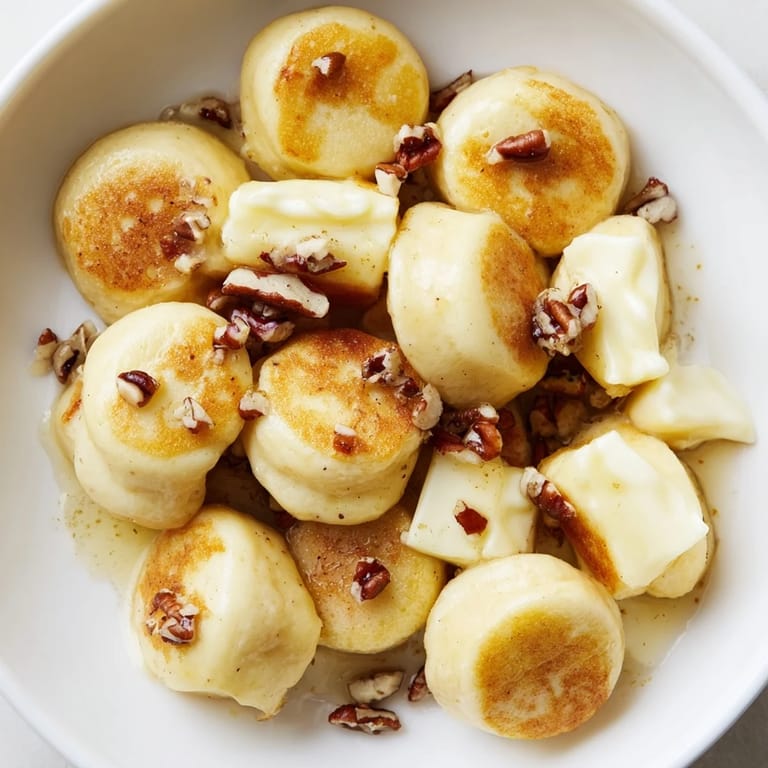
- Drizzle warm bites with honey or maple syrup and scatter toasted nuts on top if you're using them. Serve while they're still warm so the brie is at its creamiest.
 Save
Save I remember my mom taking one bite and immediately asking if there was brie inside, then saying, 'You made this?' with that look of disbelief that turned to pride. In that moment, I realized these bites had crossed from being a recipe into something I could offer people—something that felt thoughtful without demanding hours in the kitchen.
Why the Sweet-Savory Combination Works
There's something almost magical about how fluffy pancake batter plays against creamy, tangy brie—it's the same principle that makes us crave prosciutto and melon or fig jam on cheese boards. The sweetness of the batter and the maple syrup drizzle don't compete with the brie; instead, they amplify its earthiness and make it taste richer. The heat also matters; warm brie is velvet, and it transforms the whole texture experience from bite to bite.
Timing and Temperature Tips
These bites are forgiving about temperature, but there's a sweet spot: you want the pancake exterior set and golden before the brie center gets too hot and starts escaping. That 375°F oven temperature is the balance point—any lower and the top stays pale while the center overheats; any higher and you risk a browned crust with a cold brie inside. If you're making these ahead, bake them fully, cool completely, and refrigerate; then warm them in a 300°F oven for five minutes before serving so the brie softens back up without the pancake drying out.
Flavor Variations Worth Trying
Once you've mastered the basic version, the variations become endless and genuinely exciting. Try stirring a teaspoon of fresh lemon zest into the batter, or add a pinch of cayenne pepper to play up the savory side of the brie. Instead of plain cubes, press a small dollop of fig jam or cranberry sauce into the center of each cheese cube before covering with the top layer of batter—this creates a sweet-tart surprise that feels fancy but takes no extra time. Camembert, aged goat cheese, or even sharp cheddar work beautifully if you want to experiment with different cheeses, though brie remains the silkiest, most forgiving option.
- Fresh herbs like thyme or rosemary sprinkled on top while still warm add an unexpected savory depth.
- A drizzle of aged balsamic reduction instead of maple syrup gives these a sophisticated, restaurant-quality finish.
- Swap pecans for pistachios or almonds for different texture and a hint of bitterness that balances the richness.
 Save
Save These bites have become my answer to 'what should I bring' because they're generous without being fussy, impressive without requiring restaurant skills. Every time someone asks for the recipe, I know I'm sharing something that's earned its place at the table.
Recipe FAQ
- → What type of cheese works best for these bites?
Soft, creamy cheeses like brie are ideal for melting inside the batter, providing a rich texture and mild flavor.
- → Can I prepare these bites ahead of time?
Yes, you can prepare the batter and assemble the bites in advance; refrigerate before baking for fresher results.
- → How do I prevent the batter from leaking during baking?
Ensure the cheese cubes are fully enclosed by batter and fill muffin cups carefully to minimize leakage.
- → Are there options to add extra flavors on top?
Drizzling honey or maple syrup and sprinkling toasted nuts like pecans or walnuts adds delightful sweetness and crunch.
- → Is it possible to make these bites gluten-free?
Using a gluten-free all-purpose flour blend instead of regular flour makes a great gluten-free alternative.