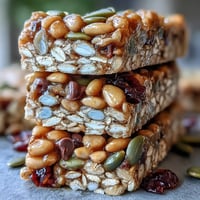
Save
Save I discovered these by accident one afternoon when a friend was coming over and I had half a charcuterie board sitting on my counter. Instead of just arranging everything on a plate, I thought: what if these became something crispy? Twenty minutes later, I had these golden, shattering chips that tasted like the best parts of every cured meat and cheese I'd ever loved. They became the thing people asked me to make again.
My sister brought her new partner to dinner once, and I was nervous about impressing him. I made these chips as an appetizer, and he spent the first ten minutes just eating them quietly, one after another, until the plate was empty. Sometimes the simplest things say the most.
Ingredients
- Salami, thinly sliced (100 g): The paprika-forward one that gives you that peppery bite—look for slices thin enough to see light through.
- Prosciutto, thinly sliced (100 g): This becomes almost translucent and shatters like glass when it crisps, which is exactly what you want.
- Pepperoni, thinly sliced (100 g): The oil here helps everything crisp beautifully, so don't skip it.
- Hard cheese, sliced (100 g): Aged cheddar, Manchego, or Parmigiano-Reggiano all work—pick whatever has a clean snap when you bite it.
- Semi-hard cheese, sliced (100 g): Gouda or provolone gives you a little chew before the crisp, which balances everything.
- Fresh herbs, optional: Thyme or rosemary add a whisper of earthiness without overpowering the meat and cheese.
- Cracked black pepper, optional: Just enough to remind your palate you're eating something sophisticated.
Tired of Takeout? 🥡
Get 10 meals you can make faster than delivery arrives. Seriously.
One email. No spam. Unsubscribe anytime.
Instructions
- Get your oven ready:
- Preheat to 375°F and line two baking sheets with parchment paper. You need two sheets because the meats and cheeses bake at different speeds, and mixing them would give you either rubbery meat or broken cheese.
- Layer the meats:
- Arrange your salami, prosciutto, and pepperoni in a single layer on one sheet without overlapping. They need room to breathe and crisp evenly—think of it like laying down a forest floor where each piece gets its own patch of sunlight.
- Layer the cheeses:
- Spread your hard and semi-hard cheeses on the second sheet with a little space between each slice. They'll bubble and crisp at their own pace, and crowding them means some will stay soft while others burn.
- Add flavor if you want it:
- This is your moment to sprinkle herbs or pepper over the cheese. A light hand is better here—you want people to taste the cheese first, then discover the herb.
- Bake the meats:
- Pop the meat sheet in for 8 to 10 minutes until the edges curl slightly and darken. You'll know it's right when the kitchen smells like a fancy cured meat counter and the slices are just starting to brown at the edges.
- Bake the cheese:
- While the meat finishes its last few minutes, get the cheese in. It only needs 6 to 8 minutes—you're looking for golden color and gentle bubbling, not scorched corners.
- Cool everything completely:
- Let the meats cool on the sheet for a minute or two, then transfer to a plate. The cheese needs a full 5 minutes before you touch it, otherwise it's still molten inside. As things cool, they crisp even more, which is the magic part.
- Serve it like you meant to:
- Arrange both the meat chips and cheese chips on a board or platter. Serve right away while everything still snaps between your teeth.
 Save
Save I made these once for a neighborhood potluck, and they were gone in the first five minutes—not even a crumb left on the platter. Someone asked for the recipe, and I realized I'd never actually written it down. I'd just been making them from intuition and muscle memory, which felt like proof that they'd become something real in my kitchen.
Why These Work Better Than You'd Expect
Most cured meats and cheeses are designed to be eaten cold and soft, which is why the idea of crisping them feels strange at first. But heat does something wonderful: it concentrates the salt and fat and flavor, turns everything lighter and crispier, and somehow makes each ingredient taste more like itself. The rendered fat from the meat helps the cheese crisp. The cheese's edges brown and caramelize. It's not complicated food, but it's honest food.
Timing and Temperature Matter More Than You Think
I made a batch once at 400°F trying to speed things up, and the meats burned while the cheese stayed soft. Another time I baked everything together, and the cheese bubbled away while the meat was still chewy. The 375°F temperature and separate baking times aren't fussy—they're the difference between something crispy and something sad. Trust the numbers, and everything else follows.
Ways to Make Them Disappear
These chips are perfect on their own, but they're also a secret weapon for any gathering where you want people to feel like you've done something impressive without much work. Arrange them on a board with olives, pickles, and a good wine, and suddenly you have a charcuterie moment that cost you fifteen minutes of effort and tastes like you've been planning it all week. They're also just the right thing to eat while you're finishing up dinner preparations—a little salty, a little rich, and completely satisfying.
- Serve them with a pale red wine like Pinot Noir or a crisp white, and watch people understand why cured meats and cheese are meant to be together.
- Make them a few hours ahead and keep them in an airtight container—they stay crispy and actually taste even better the next day as the flavors settle.
- Double the batch; they disappear faster than you'll believe, and cold leftovers are even better than you'd expect.
 Save
Save These chips remind me that sometimes the best food comes from looking at what's already on your counter and asking what if. They've become one of my most-requested recipes, and I never get tired of making them.
Recipe FAQ
- → What meats are best for charcuterie chips?
Thin slices of salami, prosciutto, and pepperoni work well as they crisp nicely without becoming too tough.
- → Which cheeses produce the best crispy chips?
Hard cheeses like aged cheddar, Manchego, and Parmesan, alongside semi-hard types such as Gouda or provolone, bake into golden, crisp chips.
- → Can I add seasoning to these chips?
Yes, sprinkling fresh herbs like thyme or rosemary, and cracked black pepper enhances their aroma and flavor before baking.
- → How long should I bake the meat and cheese slices?
Meat slices bake for 8–10 minutes until edges brown crisply; cheese slices take 6–8 minutes until golden and bubbling.
- → How should charcuterie chips be stored?
Keep cooled chips in an airtight container at room temperature for up to 2 days to maintain their crispness.
- → Are there alternatives to boost the flavor?
Try smoked meats or add smoked paprika to cheese slices before baking for extra depth and smoky notes.