 Save
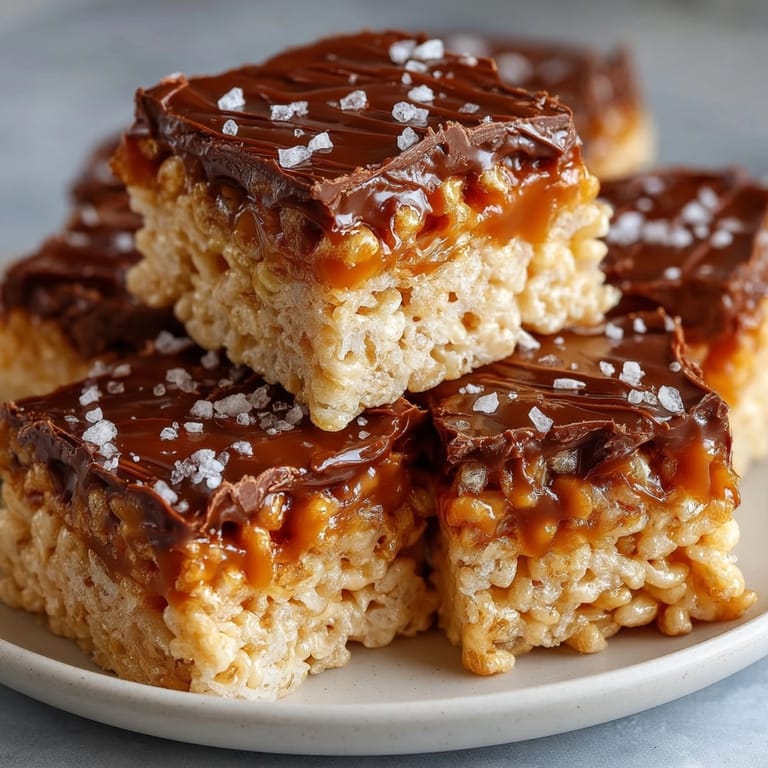
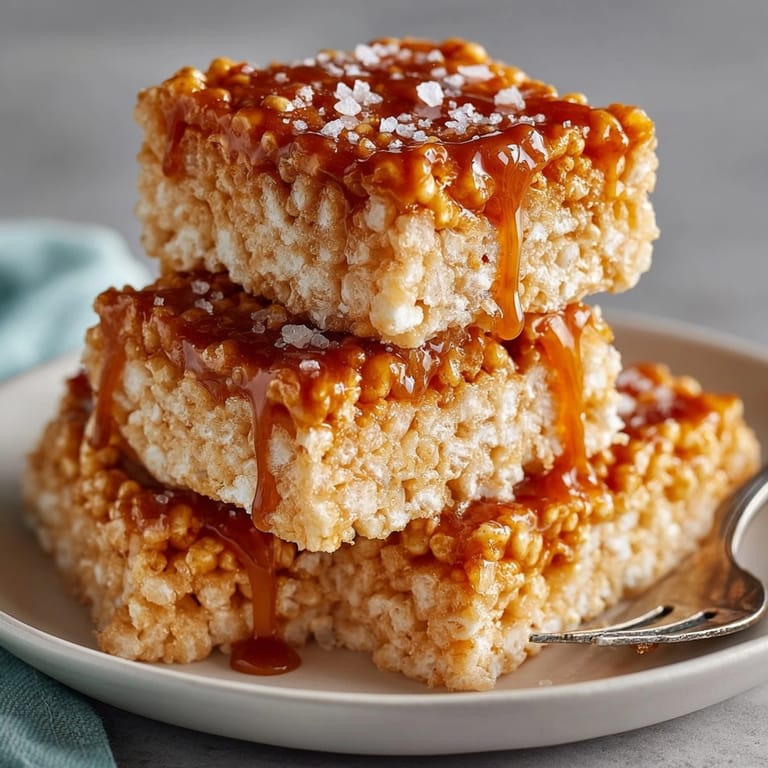
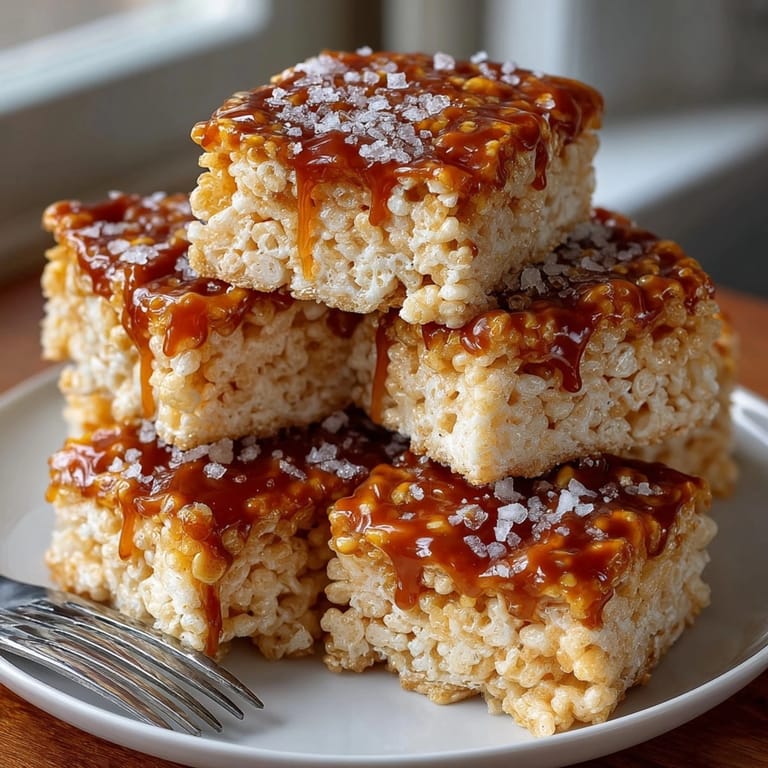
Save Salted Caramel Rice Krispie Treats are my go-to dessert when I want nostalgia and a little wow factor. This recipe upgrades the classic with buttery homemade caramel that swirls into every bite of crunchy cereal. Nothing beats the aroma when the caramel hits the marshmallow, and I have yet to meet anyone who can resist a second piece.
I am obsessed with using Maldon salt here, both for the crunch and the little glittery finish on top. My mom used to pour the cereal while I whipped the caramel, and now my niece does the sprinkling like a pro.
Ingredients
- Unsalted butter: brings richness and forms the base for both caramel and gooeyness
- Brown sugar: gives a deep caramel flavor use dark brown for extra molasses notes
- Mini marshmallows: melt quickly and provide that classic pull make sure they are fresh for maximum melt
- Flaky sea salt: balances the sweetness and elevates the caramel nuance
- Rice Krispies cereal: the iconic crunch be sure your cereal is fresh and crisp
- Vanilla extract: rounds out the caramel notes look for pure extract
Tired of Takeout? 🥡
Get 10 meals you can make faster than delivery arrives. Seriously.
One email. No spam. Unsubscribe anytime.
Instructions
- Melt the Butter:
- Place a heavy-bottomed saucepan over medium-low heat and add the butter. Let it melt entirely, swirling occasionally so it does not brown. The gentle heat prevents scorching, which is crucial for a smooth caramel foundation.
- Make the Caramel:
- Whisk the brown sugar into the melted butter. Keep whisking as the mixture comes to a bubble. Let it simmer for precisely two minutes to coax out the dark caramel flavor without letting it burn. Set a timer for this step, as homemade caramel can go from perfect to bitter very quickly.
- Melt Marshmallows:
- Reduce the heat to low and add the marshmallows to the pot. Stir continuously until all marshmallows are fully melted and combined with the caramel. Pause here just to breathe in the vanilla caramel clouds.
- Stir in Sea Salt and Vanilla:
- Remove the pot from the heat. Stir in the vanilla extract and a generous sprinkle of flaky sea salt. The salt should not fully dissolve, as flecks here and there amp up the final bites.
- Add Cereal:
- Pour the Rice Krispies into the pot and toss gently but quickly using a silicone spatula. Fold until every piece is coated without crushing the cereal.
- Press Into Pan:
- Line an eight by eight pan with parchment or butter. Transfer the mixture and use your spatula or lightly greased hands to press the mix evenly to all corners. Do not smash it down too firmly or you will lose that signature airy texture.
- Finish and Cool:
- Sprinkle a bit of extra flaky salt across the top while the treats are still warm. Let the bars cool for at least fifteen minutes so they slice cleanly and hold their shape.
 Save
Save My mom used to pour the cereal while I whipped the caramel, and now my niece does the sprinkling like a pro.
Storage Tips
Keep the treats in an airtight container at room temperature for up to four days. To maintain that perfect chew, slip a sheet of wax paper between layers. Refrigeration will dry them out so resist that urge unless your kitchen is sweltering.
Ingredient Substitutions
No brown sugar? Turbinado sugar works but might not yield as deep a flavor. Vegan butter and marshmallows make these treats dairy free with only a slight texture shift. Try using puffed quinoa or cornflakes for a fun twist.
Serving Suggestions
These bars look beautiful cut into small squares and arranged on a cake stand. For parties, drizzle with extra caramel sauce or dip one corner in melted chocolate. I love bringing a pan to park picnics just foil-wrap the whole pan and slice as needed.
Cultural Context
Rice Krispie Treats were born in the Midwest kitchens of the 1930s and have become an American potluck staple. The salted caramel trend brings the classic up-to-date while keeping the spirit of homey, sharable sweets.
Seasonal Adaptations
Swirl in crushed peppermint candies during winter Add chopped toasted pecans or walnuts for a cozy fall version Use rainbow sprinkles pressed on top for bright spring celebrations
Success Stories
I have seen wedding dessert tables swept clean of these, even when fancier confections sat untouched. Once, a neighbor brought these to a new baby meal train and they disappeared before the savory dishes. Friends text for the recipe every time and the sense of nostalgia combined with caramel surprise always wins hearts.
Freezer Meal Conversion
Slice fully cooled bars and wrap each tightly in two layers of plastic. Freeze for up to one month. Thaw at room temperature for twenty to thirty minutes before serving. This trick saved me on more than one last-minute bake sale.
 Save
Save Once you master these Salted Caramel Rice Krispie Treats, you will see how easily they become your signature bake sale or birthday tray. The magic is always in that chewy center and just a flicker of sea salt on your tongue.
Recipe FAQ
- → Which caramel works best for these bars?
Homemade or store-bought soft caramel melts smoothly into the cereal base for an even texture.
- → How do I prevent treats from sticking to the pan?
Line your pan with parchment paper or lightly grease it to release bars easily after cooling.
- → Can I use flavored marshmallows?
Yes, vanilla or caramel-flavored marshmallows enhance the sweetness and depth of flavor.
- → What type of salt should I use?
Flaky sea salt provides best results for a gentle crunch and balanced salt essence.
- → How long do the treats stay fresh?
Stored in an airtight container, they remain chewy and flavorful for up to four days.
- → Can I add toppings to enhance texture?
Try chopped nuts, chocolate drizzle, or extra caramel on top for added crunch and flavor.